Winter Ultralight Backpacking Gear List 2017

A detailed look at my 2017 Winter Ultralight Backpacking Gear List

For a detailed list of my winter backpacking gear, with itemized weights and descriptions, you can download PDF and CSV format copies of this list as well as lists for previous trips / videos my Gear Lists page.

List in PDF Format  for viewing and printing.

List in CSV Format  for use in your favorite spreadsheet or backpacking software.

Below is a simplified list of the backpacking items shown in the video (without weights or descriptions).

Pack
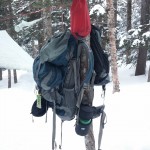
Backpack – ULA Ohm 2.0
Pack Cover – Dutchware Argon

Stuff Sacks and Storage
Bear Bag Stuff Sack, Water Resistant 8L
Bear Bag Line
Zip-lock Bag – Sandwich
Stuff Sack 4L
Zip-lock Bag – Gallon

Tools
Compass
Lighter – Eddie Bauer
Multi Tool – Tool Logic Card
Carabiner, S-Biner – Large
Carabiner, S-Biner – Mini
Fire Starter, Wet Fire
GPS Unit – Garmin Oregon 650

Cooking & Eating Utensils
Cook Pot – 750ml Titanium
Cookset Stuff sack
Matches – Waterproof
Fire Steel – Light My Fire, Mini
Pot Cozy
Spoon – backup, disposable
Spork – Sea to Summit Alloy
Windscreen – Titanium
Stove – Mini Canister Stove
Paper towels squares and Sea to Summit Soap slivers

Hammock System
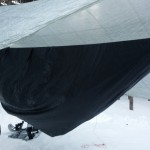
Hammock Body – Dutchware Chameleon w/ over cover
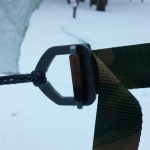
Hammock Suspension – Dutchware Dyneema straps with Beetle Buckle

Sleep System
Under Quilt – Hammock Gear Incubator 0
Top Quilt – HG Burrow 0

Shelter
Tarp – Hammock Gear Cuben Hex Tarp
Ground Cloth – Tyvek, long
Tent spike – Titanium

Water Treatment & Storage
Water Filter – Sawyer Squeeze
Sawyer Filter Bag – 64oz Dirty
Water Bottle – 1.5 Ltr, Disposable
Spare water bottle caps.
1 Liter Bottle, Insulated – ‘Forty Below
Sawyer Filter Bag – 64oz Clean

Light Sources
Headlamp – Fenix HL21 w/ battery
Spare AA Battery
Flashlight – Preon 2

First Aid & SOS Messenger
First Aid Kit
Spot Messenger

Toiletries
Toilet Paper
Toiletry Kit
Wet Wipes
Hand Sanitizer

Clothing, Secondary & Spare
Jacket – Montbell UL Down Parka
Socks, Wool – Heavy Wgt
Hat, Beanie – Lt Wgt Fleece
Shirt, Long sleeve – Fleece Lt
Long Underwear, Merino
Shirt, short sleeve
Sock Liner, Med Wgt Carhartt
Pants, fleece lined by EMS
Gloves, Work

Clothing Worn
Hat, Beanie – Hvy Wgt
EMS Hard shell Jacket
Fleece, Military – Hvy Wt
Shirt, Long Sleeve -Lt Wgt
Shirt, short sleeve
Pants, Hardshell
Socks, Wool – Med Wgt
Long Underwear, Synthetic
Boots, Winter High Top Garmont GTX
Sock Liner, Med Wgt Carhartt
Gloves, Heavy Winter
Glove Liners, Merino Wool Lt
Face mask / neck gaiter by Seirus Innovation

Location Selected! – Solo Winter Backpacking Trip (Pt 2)

Based on Viewer Feedback I’ve Chosen the Location for my Solo Winter Backpacking Trip!

For the second installment of this series, I’ll be talking about my final choice for the location of the upcoming backpacking trip that I’ve been planning.  How did I make my decision on the final location for my winter camping trip?  You told me!

A very big thanks is in order for all of the super helpful viewers and subscribers that shared their feedback on the previous trip planning video.  Obviously, i had to narrow it down to just one area out of the hundred of backpacking routes that we shared, but I definitely learned a ton of useful info on areas for future trips as well.

For now though, I’m going to focus on the spot chosen for this trip.  Which is, of course, – Oh, come on, you didn’t think I’d really ruin the surprise by typing it here, did you?  🙂


I plan to do continued updates throughout the whole process of planning this winter hiking trip. All the way from location selection, specific route planning, getting there, doing the actual trip, and whatever else may come up in between, so check back for updates!

Where Should I go? – Solo Winter Backpacking Trip

The Beginning Stages of Planning for my Solo Winter Backpacking Trip.

For part one of this series, I’ll be discussing my upcoming plans for a solo winter camping trip.  I’m currently in the very first stages of planning this trip.  In fact I haven’t even decided on the actual location yet!  Got any ideas?

I plan to do continued updates throughout the whole process of planning this winter hiking trip.  All the way from location selection, specific route planning, getting there, doing the actual trip, and whatever else may come up in between, so check back for updates!

Train to Trail – Harpers Ferry Winter Backpacking Trip – Hiking in Virginia

Join Mike and I for for a “Train to Trail” Winter Camping, Backpacking, Campfire cooking, & Hiking adventure in Harpers Ferry, WV.

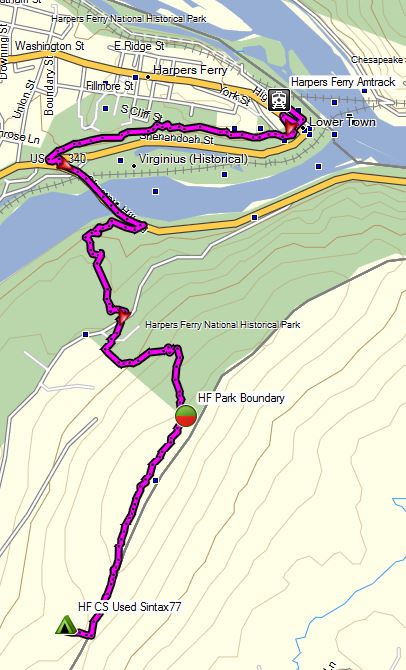
We tried something a bit different for fun on this winter camping trip – instead of driving, we decided to take an Amtrak train directly to the trailhead.  This is actually and idea that Mike and I had been kicking around for a while now.  The first challenge was finding an interesting trail that was actually close to a train station, without a need for secondary transportation or an excessive walk.  After a bit of research, we determined that Harpers Ferry, West Virginia fit the criteria quite well.  The train practically dumps you right on the Appalachian Trail.  We booked our tickets, packed our bags, and hit the trail, er, I mean, train station.

With 4 days and 3 nights off, we had a decent amount of time to play with on this trip.  The challenge however, would be that we needed to plan an out and back trip that didn’t put us to far away from the train station on our final morning, rather than doing a loop like we normally prefer.  Fortunately, we quickly realized that to be a perfect excuse to do a a laid back, more camping, less hiking  kind of trip.

The plan?  After leaving the train behind,we would hop on the Appalachian trail for a few miles – just long enough to feel the seclusion of the deep winter woods, and set up a base camp for the duration of the trip.  Other than that, we really had no hard set plans, other than relaxing, having a good time, and brushing up on our campfire cooking skills.  Did we succeed?  I guess you’ll just have to watch and see…

Trailhead:  Harpers Ferry Amtrak Train Station

GPS Data for this trip available on the Trip Data Page.

Harpers Ferry Winter Route Overview Sintax77

Harpers Ferry Winter Route Overview Sintax77

Trails Used
Leave Harpers Ferry via Appalachian Trail South
After around 3 miles, bushwack West to unofficial campsite.
Return via Appalachian Trail North

Notable Gear Used on this Trip by Mike
Gregory Palisade 80 backpack
EMS Down Parka
EMS Ascent Hard shell Jacket
MSR Whisperlite International stove
Dream Hammock Thunderbird Hammock
Hammock Gear Burrow 20 top quilt
Hammock Gear Incubator 20 underquilt
Hammock Gear Cuben Hex Tarp with doors
Portable bluetooth speaker with fancy lightshow
GSI cookset

Notable Gear Used on this Trip by Sintax77
EMS Longtrail 70 backpack (2011 version)
Montbell UL down parka
EMS Ascent Hardshell
MSR Rapidfire stove (see my video on it here) *no longer manufactured – modern equivalent is the MSR Windpro.
MSR Flex Skillet
Dollar Store tongs and turner for cooking
Sea to Summit Alpha Cutlery Set
Fozzils Bowl / Plate
Dream Hammock Darien Hammock
Hammock Gear Burrow 0 top quilt
Hammock Gear Incubator 0 underquilt
Hammock Gear Cuben Hex Tarp (standard model, no doors)
Pocket Chainsaw
SOG Flash I tanto blade pocket knife

Mt Washington Winter Ascent – Backpacking in Huntington Ravine

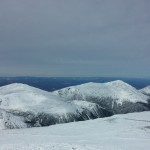
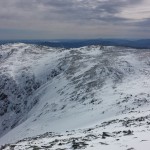
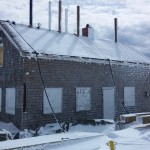
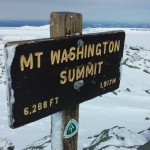
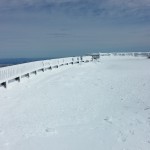
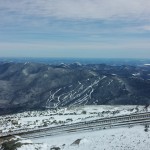
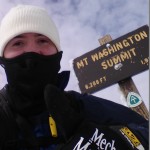
Join me as I attempt a winter ascent of Mt Washington, while hammock camping in the Huntington Ravine.

For this trip, I’ll be heading up to the White Mountains for one more winter backpacking trip before the season ends, and spring arrives.  This will also be my first attempt to climb Mt Washington in winter.  Okay, climb may be a bit overzealous of a term, but it will be pretty aggressive compared to my other winter hikes.  Which brings up an important topic – additional gear needed.  I’ll get to that a little later, but first lets take a look at where exactly I started off from and the general route I took.  Full GPS track data for this trip can be downloaded on the Trip Data page.

Parking Location: Pinkham Notch Visitor Center near Jackson, New Hampshire.

There were a couple of nice things about parking at Pinkham Notch Visitor Center.  First, there was no parking fee, so that’s always nice.  They also leave the pack room, bathrooms and changing area open 24 hours, which I was quite happy to discover upon my arrival at 2 AM.

List of Trails Used, in Order

  • Start at Tuckerman Ravine Trailhead (located right behind visitor center)
  • Follow the Tuckerman Ravine Trail.
  • Stop at the Fire Road Junction.  Do not continue up Tuckerman Ravine!  You should see a sign stating that it is closed in winter due to avalanche danger.
    Take Huntington Ravine Fire Road towards Harvard Cabin.
  • Arrive at Harvard Cabin to setup camp and get organized.
    The cabin is open from December 1st to April 1st and a caretaker is on site.  It is $10 to stay in the cabin, complete with wood burning stove, or $15 to camp in the surrounding area.  A big bonus of staying here is the water hole behind the cabin, which is maintained daily.  This allows you to get water directly from the stream below, without the chore of melting snow.  Registration is done at the Pinkham Notch Pack Room.  Click here for more details on the Havard Cabin.
  • Once setup and geared appropriately, backtrack a bit down the Fire Road.
  • Before getting back to the junction, take the Lion’s Head Winter Route on your right.
  • Follow Lion’s Head Winter Route. This is a very steep trail opened as a safer alternative to Tuckerman Ravine Trail during avalanche season.  Be prepared to use both hands as well as your ice axe for support.  While I did not carry one, a rope could be quite useful and convenient on the way back down.  
  • Rejoin the Tuckerman Ravine Trail (you’re above of the avalanche zone now).
  • Continue on Tuckerman Ravine Trail, crossing the summer Auto Road and on to the summit.
  • Follow course in reverse to return to Harvard Cabin to camp for the night.
  • On day two, hike back out via Huntington Ravine Fire Road and Tuckerman Ravine Trail.

Extra Gear used for my Mt Washington Winter Ascent

There were two pieces of gear that I brought on this trip, that I’ve never previously felt the need for on other White Mountains winter trips:  Crampons and an ice axe.

The ice axe is not to be confused with an ice tool, specialized for actual ice climbing, supported by ropes and typically headed straight up a wall of ice.  The ice as, or mountaineering axe as it’s also often called, is longer and straight with a pick for self arresting on one side (this is the primary reason to bring it out on the ice fields of Mt Washington), and an adze on the other side for digging and chopping tasks.  The adze is mostly used for more advanced mountaineering techniques than may be required on a Mt Washington attempt, but it does come in handy around camp for setting up a home for the night.

The crampons I chose were universal strap-on crampons, so that I could use them with my regular, flexible winter hiking boots, as opposed to the typical Automatic or semi-auto crampons that require a traditional hard plastic climbing boot, which I do not own.  It should also be pointed out that my usual winter traction choice, Kahtoola MICROspikes, are not crampons, nor are they in anyway comparable.  I love my micro spikes, but if I had them as my only option on this trip, I probably would have been in some trouble.  Or at the very least, it would have taken me twice as long to complete the route.

As seen in the video, there are some other pieces of gear that are essential for a Mt Washington winter climb.  I should also reiterate that no matter how favorable the forecasted conditions are, you should always pack and carry worst case winter gear.  This includes the ability to have all skin fully covered, no exceptions!  Conditions can change on a dime in the Whites.  Below are some highlights of gear I brought for the above treeline portion of my hike (other gear was left at my base camp below treeline).

  • EMS Packable Pack (small daypack)
  • EMS Ascent Mittens with fleece glove liners
  • Synthetic Ski Hat
  • Seirus Innovation Neofleece face mask / scarf combo
  • Bolle Mojo Snow Goggles (Lemon lense color)
  • Spare hat and gloves (in case others get wet or blown away)
  • Garmont GTX Snow boots
  • CAMP Stalker Universal Crampons
  • Black Diamond Raven Ice Axe
  • Nalgene 1 Liter wide mouth water bottle

Clothing worn was pretty much exactly what I’ve used on my previous White Mountains snow camping trips.  I cover some of the details later in the video as well.  You’ll also notice that I do not have snowshoes listed on my above treeline list.  I brought a pair of MSR Denali Ascent snowshoes that I left at my base camp, and in fact, that was the only place that they were necessary.  I did not find them to be need on the wind blown, ice covered summit cone of Mt Washington – crampons took care of that nicely.  The section of Tuckerman Ravine trail approaching Harvard Cabin traversed daily via snowmobile by rangers checking avalanche conditions, so I really didn’t need snowshoes on that portion of the hike as well.  A few steps off the trail though, and you’ll quickly find yourself in waist deep snow or more.

Notable Gear Used at Camp

  • Dutchware PolyD 10′ Hammock with Dutch Titanium Cinch Buckle suspension, Dutch Clips and 12′ webbing straps. I take a look at cinch buckles in this video post.
  • Hammock Gear Incubator 0 Underquilt
  • Hammock Gear Burrow 0 Top Quilt – Here’s my post on both HG Quilts.
  • Dutch Winter Sock for extra protection for wind and blowing snow.
  • Hammock Gear Cuben Hex Tarp, 12′ – equipped with 9′ Zing-It guy lines and Dutch Wasps for quick tension adjustment.
  • MSR Rapidfire Stove – Here’s video post for a closer look at the Rapidfire.
  • Vargo 450ml titanium cup
  • Toaks 750ml titanium pot for water boiling.
  • Sea to Summit Long Handled Aircraft Aluminum Spork
  • EMS Longtrail 70 Backpack
  • MSR Denali Ascent Snowshoes
  • Various meals and food from Packit Gourmet.


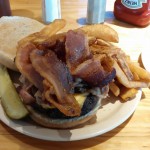
Post-Hike Burger for this Trip

“Pig Out Burger” (Smoked Pork, Bacon & Cheese) from
Yankee Smokehouse in Ossipee, NH.

When Sub-Zero Camping Goes Wrong – Winter Backpacking in the White Mountains


Join us for some frigid winter camping and backpacking along King Ravine in the White Mountains.

For this overnight backpacking trip we’ll be heading up towards Mt Adams, along the Presidential Range in New Hampshire’s White Mountain National Forest in early February.  This trip was done almost a year to the day after our High Winds Hiking trip during the previous season.  Only instead of temperatures in the 20’s to 30’s, we had a dramatically different temperature range the low teens at it’s warmest, down to roughly 20° below zero at night.  Ouch.  Luckily, we didn’t have the extreme winds that we encountered on that last February trip.  One or the other is one thing.  Both together, now that’s what you don’t want.

As you’ll see in the video though, things still didn’t go – how should I say – well, as planned.  Thankfully, we were able to make the best of it and play things by ear.  While I certainly would have like things to have gone a bit closer to our anticipated itinerary, I think it still ended up be a quite memorable trip.  When things go as planned, that’s a vacation.  When things go awry and you have to react and adapt, that’s an adventure.  And that, after all, is what we’re truly after.  As long as know one get hurt, or suffers too much mental trauma, I’ll chalk it up as a win.

Below is a list of trails used, in order, as well parking info and other logistical items.  Unfortunately, due to the sub-zero temps, there was no full gps track recorded for this trip.  After ripping through two sets of Ultimate Lithiums in my Garmin Oregon 650 GPS on day one, I made the call to reserve my remaining rechargeable batteries for emergency route fining only.  On my last winter trip to the Dolly Sods, with temps in the low 20’s, I was able to go the entire 3 day trip on one set of lithium with juice to spare.  My performance was quite different at 15 or so below zero, though.  Once it warms up a bit, we’ll get back to recording full track data as usual.

Parking Location
Appalachia Trailhead
44.371470, -71.289391
(Not too far from the intersection of US Rt 2 and Dolly Copp Rd, in Gorham NH)

Trails Used
Airline Trail to
intersection with Upper Bruin Trail, just above treeline in the Alpine Zone
Planned Campsite:  Valley Way Tentsite or nearby vicinity, via Valley Way Trail
Actual Campsite:  Back below treeline, along the Airline Trail.

Our plan was to summit Mt Adams the following day and return cheerfully to our previous night’s campsite, base camp style.  As seen in the video, things got a bit more complicated, due to extreme snow drifting along King Ravine’s Alpine Zone, heading towards Madison Hut and the intersection with the Appalachian Trail towards Mt. Adams.  The plan was to save Adams for day two and to use Upper Bruin Trail to head back below treeline to establish a base camp, after getting some  brief views in the ravine above treeline.  Despite having been to this area twice before in milder weather, the high snow drifts and unbroken trail made navigation, umm, complicated, to say the least.  Add Mike’s little ordeal to the mix, and you’ve got yourself a very interesting little winter camping trip.  But I’ll let you find out how all that goes in the actual video…

 A Quick Overview of some of the Gear Used
Big Agnes 6p tent (yes, is a car camping tent.) Split three ways.
EMS Longtrail 70 Backpack
MSR Denali Ascent Snowshoes
Kahtoolah MICROspikes (the plan was to feel things out while ascending Mt Adams, and turn back if it felt like crampons were more acceptable)
CAMP Snow Shovel
MSR Rapidfire Stove (Inverted canister stove, no longer produced)
*Mike carried an MSR Whisperlight Universal, rigged for white gas, which we ended up using at night due to the colder temps.
Big Agnes Q-Core SL Sleeping Pad
Hammock Gear Burrow 0 Top Quilt
GSI Halulite Tea Kettle, 32 oz, for snow melting
Vargo 450ml titanium cup
Sea to Summit Alpha Light cutlery set (knife, fork, spoon)

Camera Gear Used
Sony Handycam HDR-cx380, primary cam
GoPro Hero 3, Black edition, secondary cam.
RavPower 10,000 mAH usb battery pack recharger